

It seems to be a very simple task, but unfortunately the reality is different. The exact method varies from vendor to vendor, but generally it is possible to resize the Virtual Disk capacity without the need to reinstall the Guest OS in Virtual Machine.
There are two main steps, that need to be done:
- Resize the Virtual Disk file
- Make the guest OS aware of the change
Resize the Virtual Disk file
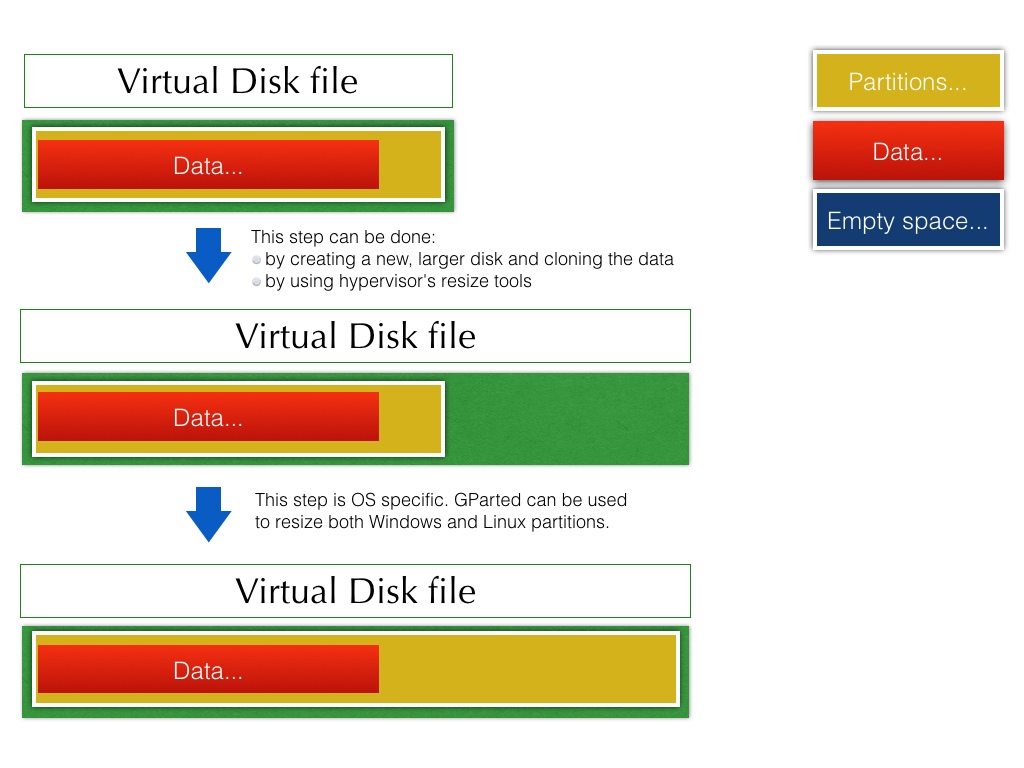
We can imagine that Virtual Disk file is similar to physical disk. It is possible to swap a small disk with a larger one.
Unfortunately this approach forces us to:
- clone all the data from smaller to larger disk
- resize partitions if necessary.
This approach will work for every hypervisor, but it takes considerable amounts of time. That’s why most modern hypervisors provide tools to resize existing Virtual Disks.
VirtualBox
VirtualBox provides a command line tool for resizing virtual disks:
VBoxManage modifyhd <uuid>|<filename> [–resize <megabytes>|–resizebyte <bytes>]
Either the disk UUID identifier or simply file name can be used to point the virtual disk.
VMware
VMware has a command line tool for resizing disks as well:
vmware-vdiskmanager -x 100Gb vm.vmdk

It is also possible to specify Kb and Mb.
Warning: You cannot resize a disk that has snapshots:

VMware Workstation 7+ and Player 3.x+ also allow resizing virtual disks directly from GUI:
- Choose a VM from the Inventory.
- Click Edit Virtual Machine Settings.
- Choose Hard Disk.
- Click on Utilities > Expand, enter the new size and confirm by clicking “Expand”
Make the guest OS aware of the change
The disk is already bigger, but operating system still shows “no free space”. This happens because the partition size is still fixed on the old value. Partitions in guest OS need to be resized to use all the allocated space.
Windows
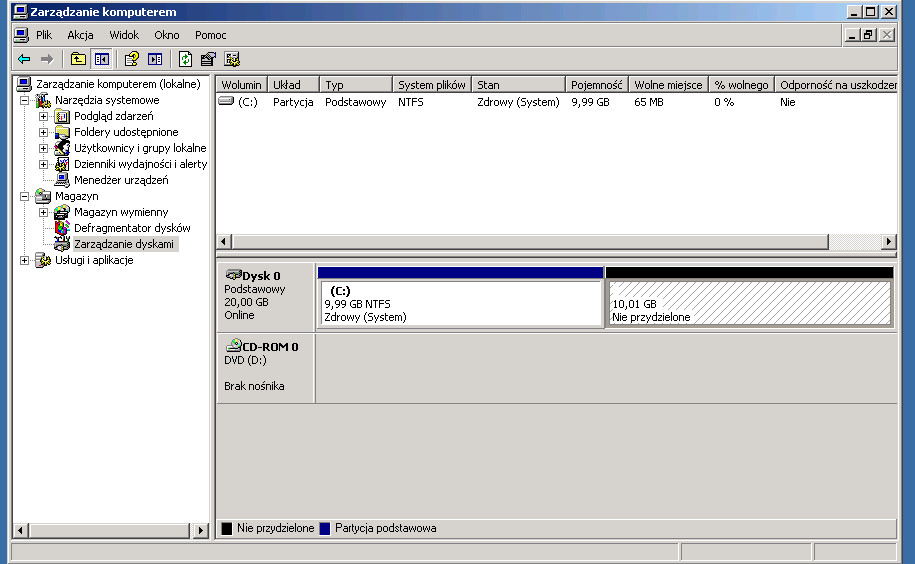 Windows XP and later have a tool called Disk Management in Computer Management panel. Unfortunately only newer versions of Windows (Server 2008, Windows 7, Windows 8) allow resizing an existing partition.
To resize partition in Windows XP it is best to use a Linux live CD such as Ubuntu, and run GParted to resize the partition (more details in the linux section). Another solution would be connecting the virtual disk to another VM (for example Windows 7) and do the resize from there.
Linux
If system is using LVM, it is best to use lvm tools to resize the filesystem:
[root@ubuntu ~]# lvextend -L20G /dev/vg00/lvroot

Extending logical volume lvroot to 20.00 GB

Logical volume lvroot successfully resized
[root@ubuntu ~]# resize2fs -p /dev/vg00/lvroot

resize2fs 1.39 (29-May-2006)

Filesystem at /dev/vg00/lvroot is mounted on /; on-line resizing required

Performing an on-line resize of /dev/vg00/lvroot to 5242880 (4k) blocks.
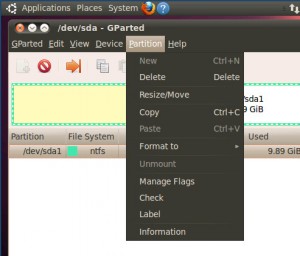
In case no LVM is in use, you will have to resize the system root partition. The easiest way to resize a partition is to use a GUI program called GParted. It will not allow to resize a mounted partition, so it’s recommended to boot the system from a Live CD and do it from there.
- Mount Ubuntu 10.04 LTS ISO image to your VM
- Boot your VM from that CD. You may have to force the VM to BIOS and change boot sequence there.
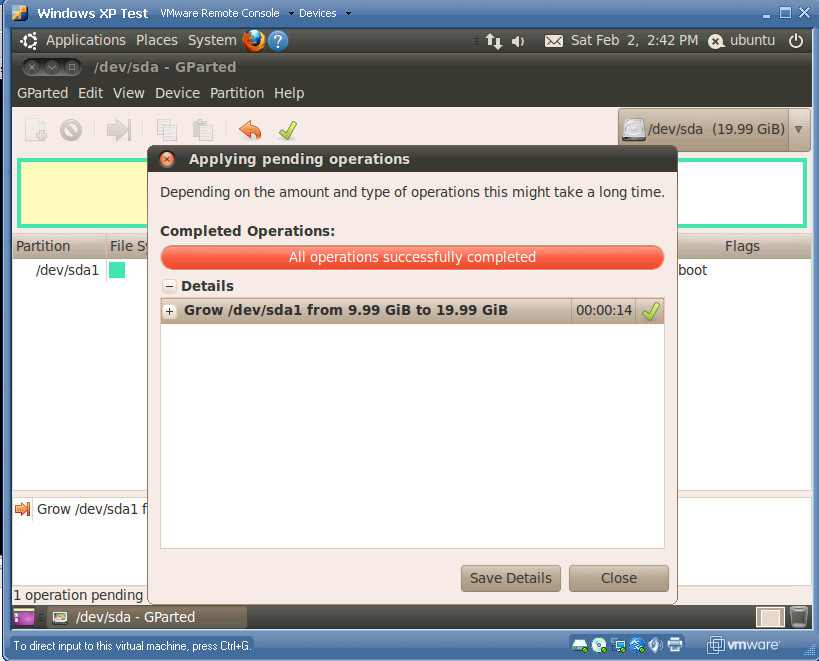
- Run GParted: System -> Administration -> GParted

- Select the Virtual Disk (should be /dev/sda)
- Choose the partition you want to resize
- Partition -> Resize/Move
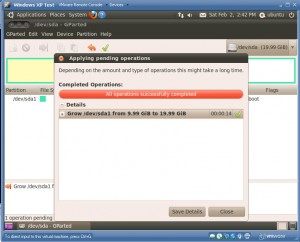
- Enter the new size
- Apply changes
- Shut down the VM
- Unmount Ubuntu ISO image


More Information
https://blogs.oracle.com/fatbloke/entry/growing_your_virtualbox_virtual_disk
You must log in to post a comment.